Showing posts with label Food. Show all posts

Thursday, September 12, 2013

Baked Onion Straws

The other night I decided that I wanted some onion straws. I have no clue why I was craving them, but I wanted them. So, I decided to take the rest of an onion and make some. My absolute first time making them and they turned out pretty good.
All you need: 

- an onion (whole or left over) - I had half of one left and it made quite a bit.
- 1/2 cup of bread crumbs 
- 1/2 cup of flour
- 2 eggs
- 3 bowls
- baking sheet
- fork (to scramble eggs)
- old bay seasoning (any other seasoning you feel like adding)
- salt

Directions:

Heat the oven to 400 degrees. 

Line up your three bowls and place your pan at the end. 

Add 1/2 cup of flour into bowl.

Add 1 egg into one bowl. (add other egg when wash becomes low)

Add part of the 1/2 cup of bread crumbs into the last bowl. Sprinkle with old bay seasoning. (add the rest of the bread crumbs when it begins to clump)

** You're adding half because you will need more as the dry ingredients begin to clump **

Take your mandolin/knife and cut your onion into thin slices --- but not to thin!


Once you've sliced your onions. Begin by placing a few of your onions into the flour mixture.


Coat the onions well.

Then dip into your egg wash.

Then coat with bread crumbs/old bay seasoning.

Place on pan. 

Continue to do this until you have used your entire onion. 

Cook for 7 minutes. Check it. Flip over. Cook for another 7 minutes. 

Watch very closely.

Enjoy!


Thursday, March 28, 2013

Instant Cup of Mac & Cheese ~ A Pinterest FAIL!

I found this recipe on Pinterest and decided that I would try it one night. I wasn't really in the mood to cook a whole pot of mac & cheese. Looking back though I wish I did because the mess this thing made was ridiculous! It was honestly a complete Pinterest fail and I mean FAIL!

Here's what it was supposed to look like:

The Family Kitchen
And here's mine:


Looked pretty easy right? Well, HA! I followed the directions closely but in the end it turned out to be a hot freaking mess. The stuff literally exploded in the microwave and was an absolute ridiculous mess to clean up. The cheese was stuck to the walls of the microwave, and even the plate, the cup, and everything in between. Not to mention, the liquid mess too. Anyways, it took awhile to clean up and even took several days to soak in water before being washed. I still had to scrub the cup after those several days. 

I'm pretty disappointed. I may try it again one day. I'll figure everything out when I decide to. However, right now I'd rather just do it the old fashioned way... it's a lot easier. 

Any suggestions on what I could have done wrong?


Monday, March 25, 2013

Pizza Pockets

Probably one of my most favorite foods from when I was a kid were pizza pockets. These were simple things that my mama would make with my brother and I, sometimes during lunch and then sometimes we had them for dinner.

Here's what you need:

* Pizza Sauce
* Pizza Cheese or Your Favorite Kind
* Butter
* Bread
* Any other fillers that you choose: pepperoni, onions, mushrooms, etc.
* Sandwich maker


To make these yummy sandwiches:

* Heat up your sandwich maker/grilled cheese maker

* Take your bread and slather on some butter on one side of each piece of bread (this will act as your non-stick)

* Once it has fully heated and the light has changed, place once slide of bread onto the surface.

* Next, take your pizza sauce, cheese, and any other toppings and place them onto the bread.


* After, you've put everything that you want onto your bread, take your other slice and place it on top. Butter side up.

* Close the top to your maker. It will take about 5 minutes and at times a little longer. Depends on the type of maker you have. Mine usually takes about 7 minutes.

* Watch it very closely though. If the
cheese is starting to spew out, it's done and if your bread is burnt it's definitely done. 

* Slice down the middle and enjoy.


Friday, March 22, 2013

Cupcake Pizzas: A Pinterest Find!


Okay, so I probably spend WAY to much time on Pinterest. Anyways, I saw this pin for cupcake pizzas the other day and of course I pinned it... thinking one day I'll make it, just like all the other things I've pinned. Anyways, last night I decided to make them. It looked simple and easy plus I figured since my little rooter tooter was conked out I could actually try and make something instead of just throwing in whatever and eating whatever.

So here's what the cupcake pizzas are supposed to look like:

From All My Great Ideas Are Really from Pinterest
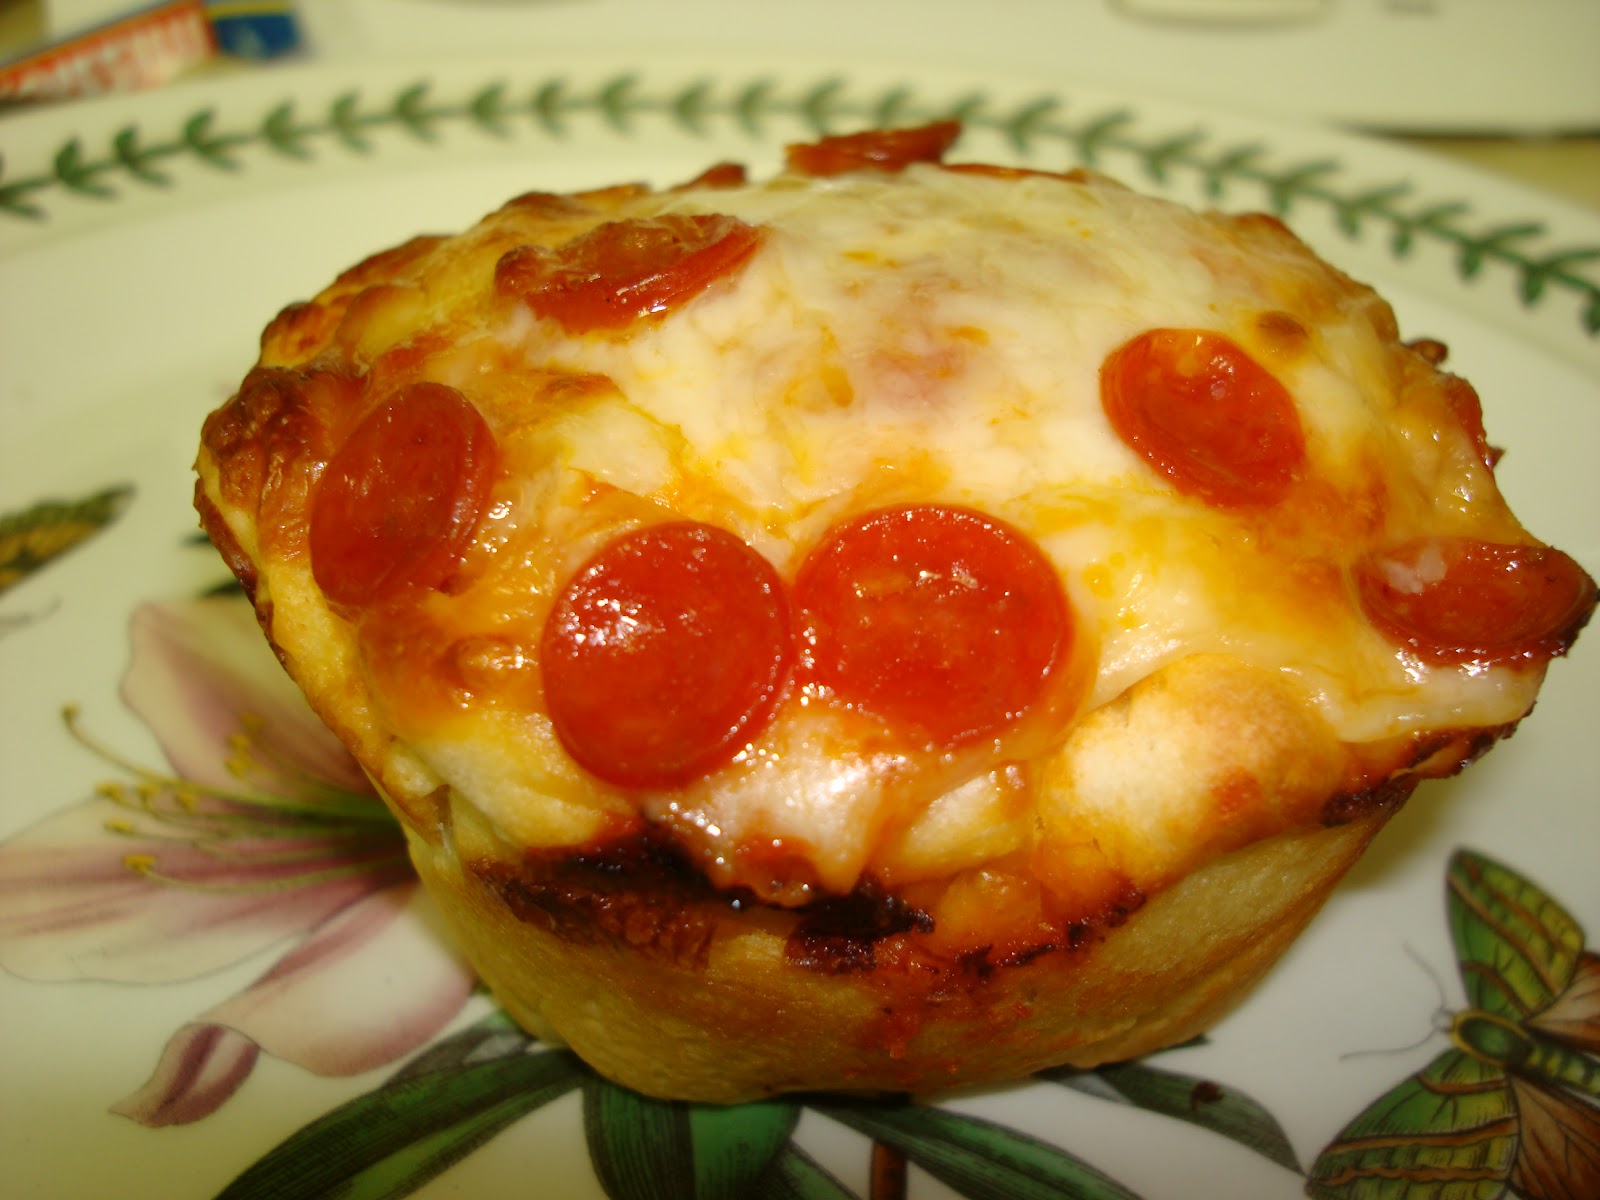
And here's mine:


Haha! So CLEARLY I nailed it!

Although mine look unsightly and maybe a tad bit burnt... they were still absolutely delicious!

So since I clearly nailed it, here's how you make them.


What you'll need:
  • Refrigerated pizza dough
  • Pizza Sauce
  • Cheese
  • Pepperonis
  • Muffin Tin
  • I used a butter spray to spray the tins
Now that you've gathered your ingredients OR at least I hope you did, here's how you put it together. It's pretty simple. 

Preheat the oven to 425 degrees. 

Grab your butter spray. For myself, instead of spraying the spray onto the cupcake pan, I grabbed a paper towel and sprayed it onto there. This gave me the ability to control the mess that I feel the spray makes every time. Plus, I was also able to control the amount of spray.

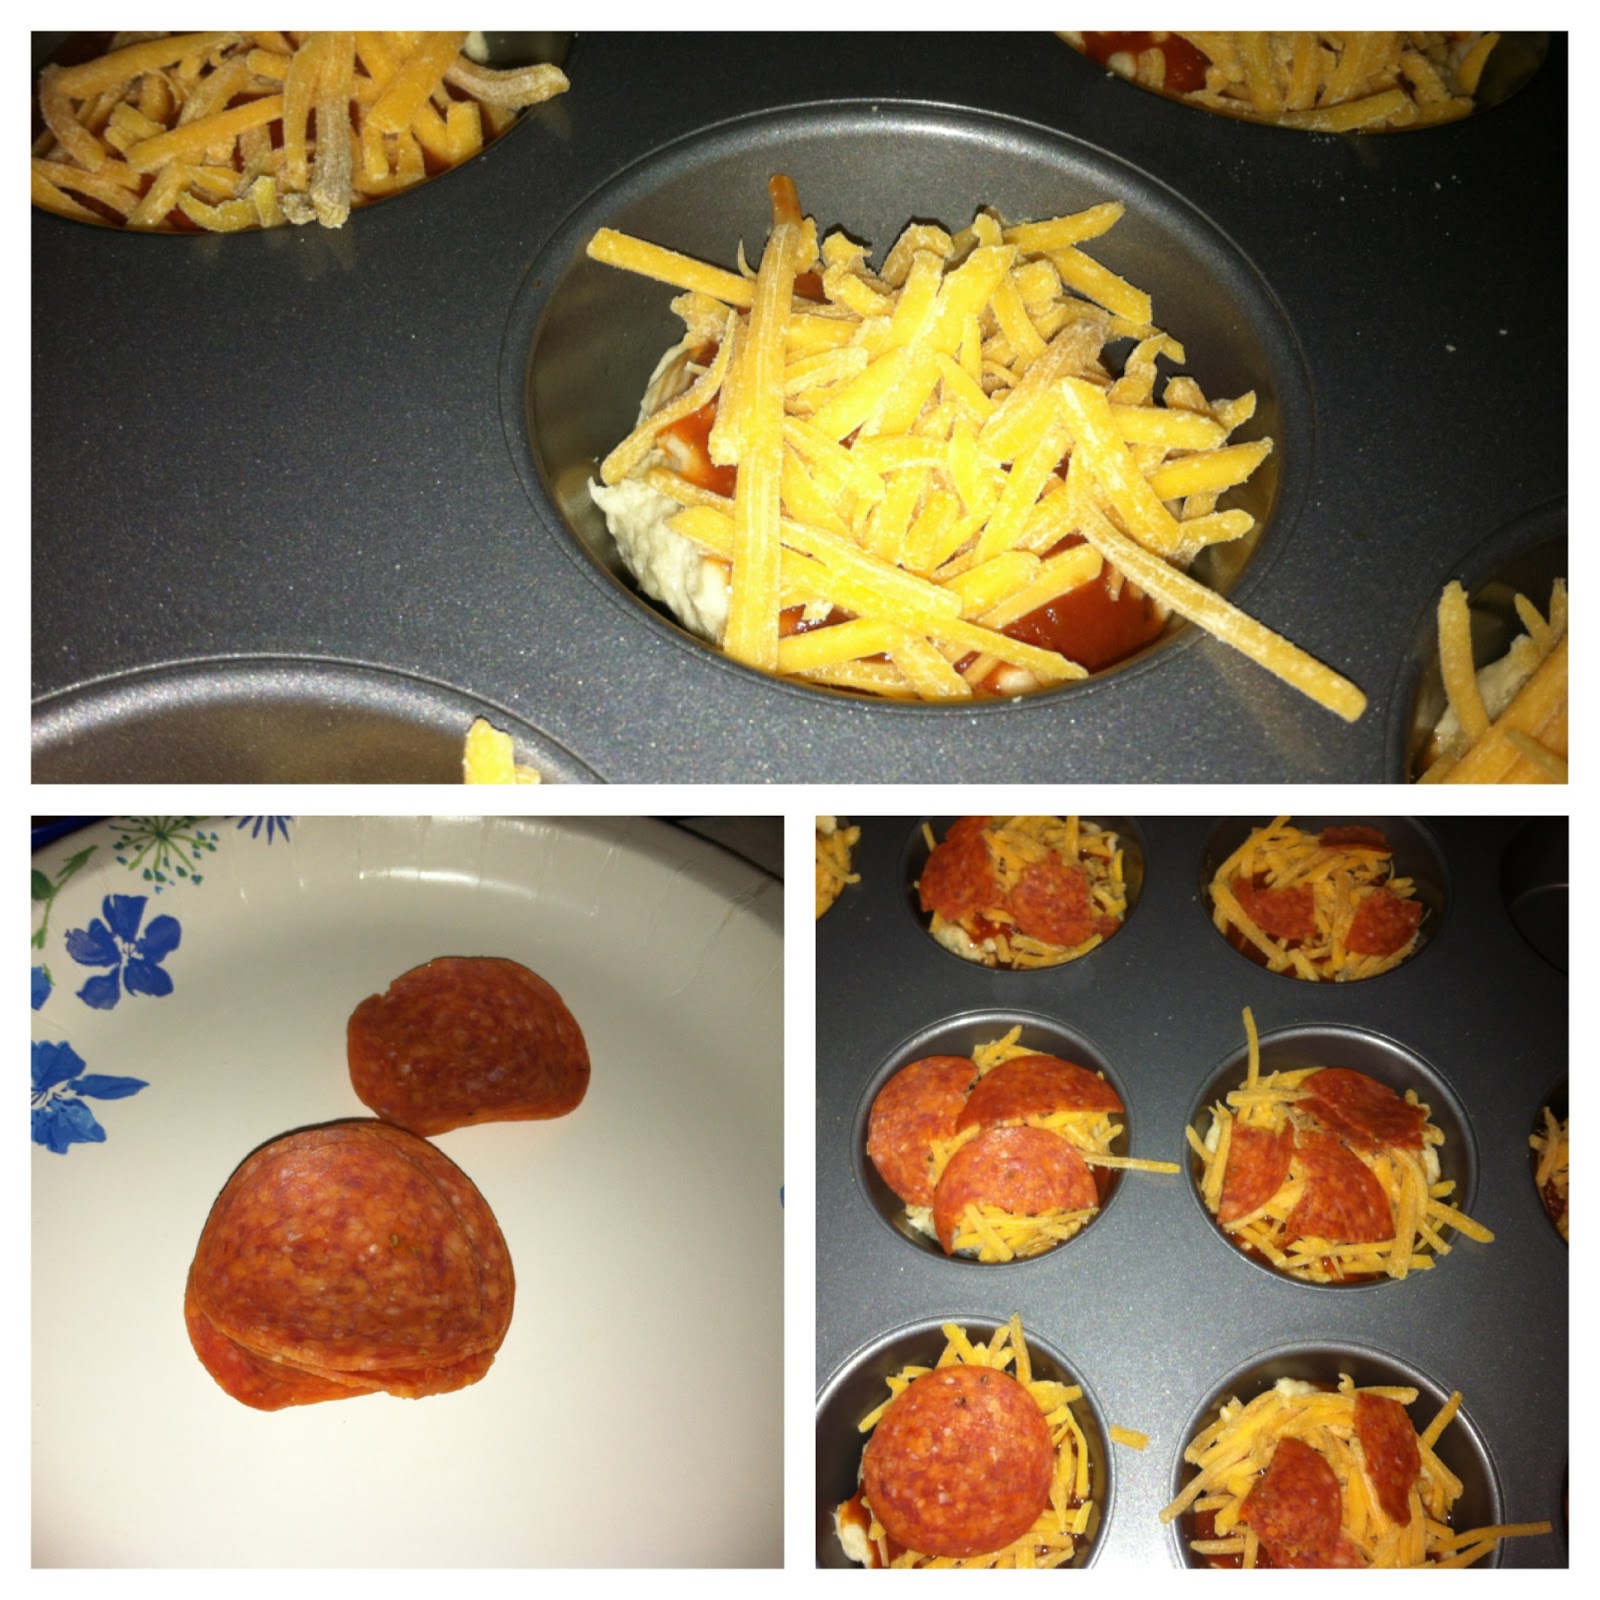
Once you've done that, open up your pizza dough and tear off pieces. Place those torn pieces into your muffin pan. Now, I pressed down to at least cover the bottom a little bit. 

After you've used all of your dough, grab the pizza sauce and begin to scoop it onto the dough. I just used a spoonful of pizza sauce for each. 

Next, you'll take your cheese and grab a tad bit and sprinkle it on top. For my cheese I used the mild cheddar since I was trying to use ingredients that we already had instead of having to buy more. Once you put your cheese on top, sprinkle on some pepperonis. Now, you can even place some pepperonis onto the pizza sauce and then add your cheese... it's up to you!

After you've made each of your pizzas place the cupcake pan into the oven and bake for 10-15 minutes. Now, I baked it for about 17 minutes to ensure the middle was cooked. 

Once time's up, let them cool for a few minutes and enjoy. They're absolutely delicious and are still amazing the next day!


Simple Mac & Cheese


Right after a major winter storm and a several day power outage we came home to some spoiled milk and a few other items. Even though our house was like an icebox and we never opened the fridge it still happened. Unfortunately, we live about 30 minutes from the nearest store; so, we have to make do until we go into town.

Well, last night I wanted some mac & cheese and figured I could make it without the milk. My husband kept contesting that fact. I tried anyways. Since my idea didn't work, we went with his. He suggested using evaporated milk. All I could think of was great this is going to taste really funky.

Ha! I was completely wrong!! It actually gave it a nice sweet taste.

You want to know how to make it, right? Well, here's what you need...

12 ounces of Velveeta Block Cheese (or any other brand, even name brand, your choice)
1/3 cup of Evaporated Milk
2 cups of Elbow Macaroni

Directions:

  1. I boiled the water at high and added the macaroni once it completely boiled
  2. Once the macaroni was done, I drained it and placed it back in the pot with the burner on medium.
  3. Now, I added the cheese 4 ounces at a time. This helped to melt it a little better.
  4. As the cheese began to melt, I added the 1/3 cup of evaporated milk. Continuously stirring until it had combined.
  5. Once it was all done we enjoyed it with a TON of leftovers! 
~*~ Also, it heats up very nicely in the microwave ~*~

Just a simple substitution with an item that we had lost and I must say it worked out very well.